OLD DOG- OLD SKILLS
- RaceCraft R/C
- Aug 7, 2021
- 9 min read
Something a little different than the normal blog posts today.
As some of you will know, I tend to run old school brushed motors whenever I can. I have had a few comments from club members and at events of late that the art of using and understanding the old modified brushed motors is being lost. A lot of racers have only ever used plug and play brushless systems, so although they would like to have a play with a traditional set up, they don't know where to start.
This is the first of what may become a series of articles on using the old gear. It came about as I was in the workshop rebguilding a stack of old motors, and the previously mentioned comments came into my mind, so I grabbed the camera and here is the result.
Now before we start. Everyone in the hobby has there own way of doing things. This is my way, you may not agree with it and have your own methods- thats fine.
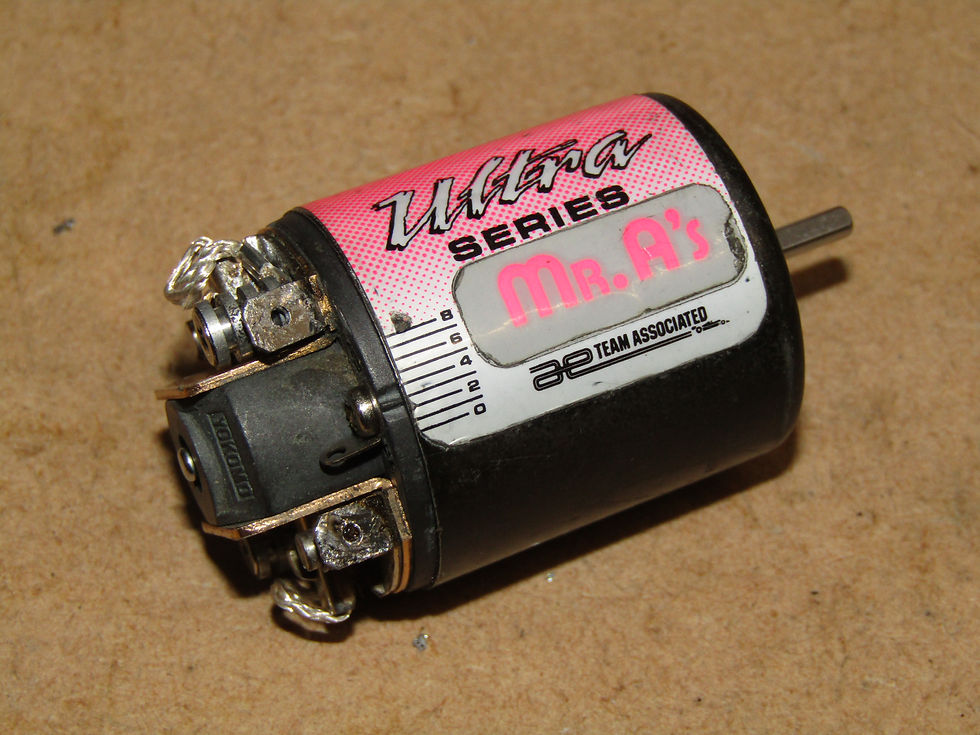
So we are starting with a proper dog of a motor. This came to us a couple of years back in an old Losi buggy that had not been touched for decades. The Reedy Mr A is a nice old motor and well worth having. Now this one is never going going to be a catwalk model again, in fact it is in a right state, but the magnets feel good and nothing is bent, so worth a little work for use as a runner.
First up is a quick inspection. The case is obviously cosmetically not great, but the front bearing housing is staright, the armature turns over Ok with out any obvious binding and the brush holders arn't bent. Good start.
Downsides: It is filthy, the brushes are very worn and there is five times as much solder as needed on the tabs and everywhere else!

Before anything else now the motor needs completly pulling apart to check the internals. You will see some pics with it back together being worked on. This is simply becasue it is easier to handle.
First check is the comm and armature. Still material left and no obvious damage to the windings. Next up the magnets. Check for cracks, chips and bits missing or loose fitting. All Ok so far.
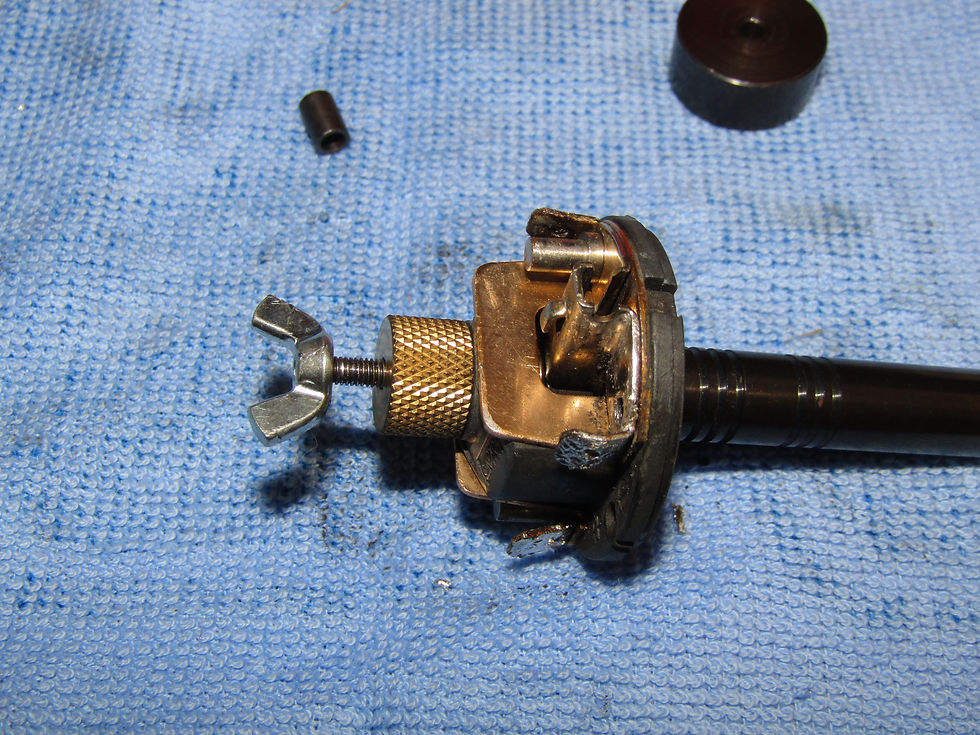
So the endbell is looking like it needs the most work. It is filthy inside, the wiring all needs redoing, brushes replacing and all that solder getting rid of.
Simple job really. Remove and bin the old wires and connector, remove the brushes, all screws and heat areas up and remove the excess solder. You will never get rid of all of it, but heating it up and flicking the endbell works. Caution it's HOT!!!
This is what we end up with after a bit of work, a few stray bits of hot solder and some swearing. Not perfect, but alot less random solder everywhere now.
I am going to leave the casing and endbell for a bit now as I know they are OK ish. But the heart of the motor, the armature is the important bit. If it is no good or can't be reworked, anything else is a waste of time.
The armature is in the comm lathe ready to skim. But before we start a word on mounting it in the lathe. It is vital that you get rid of any end float on the armature in the lathe if you want a good finish. The comm will move as you skim if not!
This armature had a delrin washer on the comm end, plus a spacer and an extra shim to stop it floating around.
So to reworking the comm.
First a good look at it. You will notice if you look closely a bump at the windings end. This tells me that this motor has been skimmed before and the person who did it stopped a little too short of the windings.
The lathe is set to this widest point to start, then wound in 0.1mm for the first pass. Don't try to take loads off at once! You will get a rubbish finish and potentially stall the lathe.
First pass of the lathe just clipped the step by the windings. This time I take it as far as I dare to even up the comm. It take 5 passes, dropping 0.1mm a pass to clear this bump. Main thing is do not rush. Pass slowly and smoothly dropping 0.1mm at a time.
You will see I am getting down there now. The comm is level over it's entire length, but just has a few marks left in it. This is the point I go really fine on the passes. My lathe has marks at 0.1mm steps. I am now adjusting down in approx 1/4 of each mark (0.025mm) to get a final finish.
From this point, this comm took another 5 passes before I was happy.
A little note at this point. I alwasy use a comm cutting fluid to lube and cool the comm as it is cut. You don't have to, and many don't, but I think it helps give a good finish. A drop on the com every pass is enough. It also helps stop molten copper building up on the cutting tool which can cause gouges in the comm.
This stuff is now pretty hard to get, but we do have a few bottles in stock, so please messages if you need some as it isn't on
the website.
There we have it. A nice smooth clean commutator. You will notice little bits of copper in the slots between the plates. The best thing to remove them is the back edge (not the front /cutting edge as it will damage the edges) of a scalpal blade run down the slot.
A quick blast with brake cleaner and that is the armature finished. Turned out well I think.
So we move onto the casing and endbell. The bearings feel Ok as best as I can tell in situ. But to clean the parts and bearings properly, it is easier to remove them using a bearing tool. It is alot easier than most people think and means you arn't washing detritus into the bearing when cleaning the casings. You can also check the bearings properly this way.
I am not going to explain step by step how to remove the bearings as each brand of tool works slightly differently, so just read it's instructions. I will say however, that when doing the endbell, it is easier to push the bearing out by hand using the tool and spacer, as they normally pop out of the plastic easy enough.
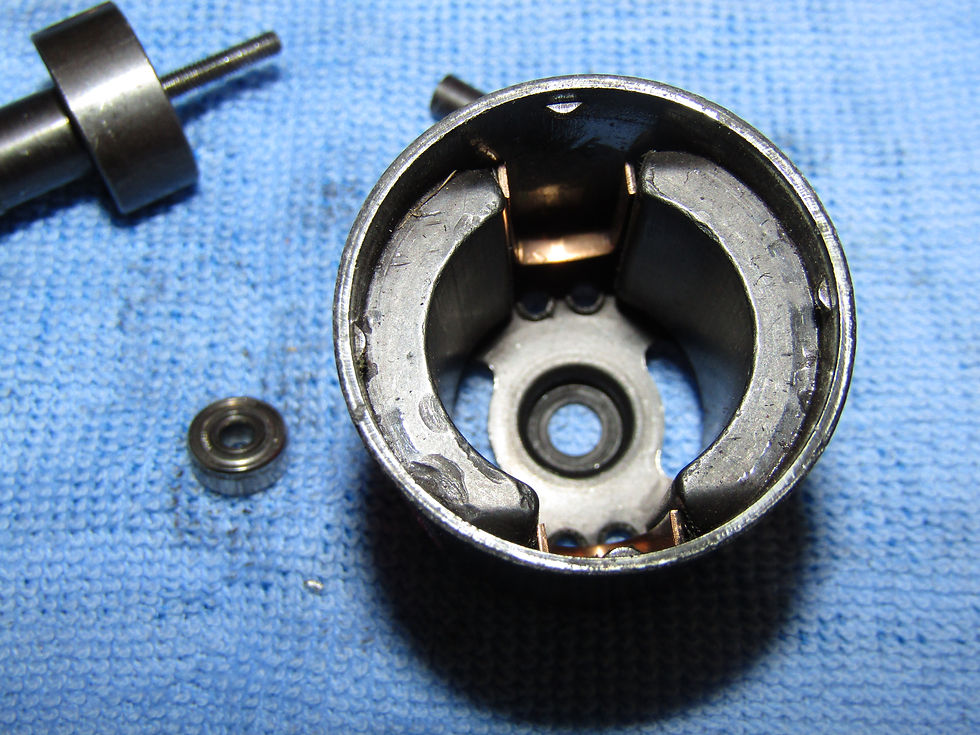
As you can see bearing out and looking pretty grubby.
So with the bearing out, give it a wipe over to remove anything obvious from the outside, then give it a good blast with a bearing or brake cleaner. I then soak mine in cleaner for 30 mins or so to dissolve any old grease and muck out. Spin it over once in a while to move it all round.
When it comes out of the cleaner, give it another balst with cleaner and spin it over.
The bearing should spin freely, but maybe rattle a tad as there is no lube in it at all at this point. If it is notchy or very noisy, it is no good, so needs replacing.
To lube the bearing use a proper quality bearing oil. Place a few drops onto the bearing and let it sit for 5 mins or so. Don't be tempted to put loads on, or spin the bearing straight away as it will throw the lube out, not let it into the crevices.
Now we can move on to the endbell. Check the brush holders are not bent as they are easily damaged and can cause a motor to stop if the brush sticks.
The endbell is best cleaned with brake cleaner or similar and some kitchen roll.
This one cleaned up lovely, so it is ready to have the bearing refitted or replaced as required.

Now refit the bearing following the instructions with your bearing tool. The endbell is fiddlier to refit than remove. Just make sure everything is aligned and pressed fully home.
You will see no other parts are fitted to the end bell at this point as they would just potentially get damaged, so are fitted later.

Now we have to remove the bearing from the main case. This will be harder as it is metal to metal and tight. Again follow your bearing tool instructions.
Bearing is checked and cleaned in the same way as the endbell bearing. The case is cleaned with brake cleaner and wiped out and checked. Pay attention that the bearing housing isn't bent or distorted.
Refitting the bearing is easy if you follow a few tips. The magnets will try and pull your bearing tool, the bearing etc out of alignment as you try to insert it. I find if you start to push the bearing in with a hex driver, just to start it, the tool then dosn't pull it out again when you fit it. Just be carefull you don't force it and make sure you tool is central when you wind the bearing in.
Everything should be now clean, fixed, tidy and ready to rebuild. You will now need some new shims, a phenolic spacer and some new brushes. Don't be tempted to use old brushes or shims. Most shims I see have some damage or wear or are missing completely. Also do not just use washers. Shims are soft, materials for a reason. We have them in the Ebay shop if you need them.
So on the comm end you should have one phenolic washer which is your insulator, then one or two thin shims so the washer dosn't run on the bearing face. These are brass or alloy as the material is softer than the steel bearing to reduce damage to it.
Test fit the armature in the end bell bearing to check you have clearance and no binding. Add extra shims if needed, but keep them to a minimum.
The case end of the armature is all about setting the end float. Add shims as required. You need just a tad of free play (endfloat). I like to add shims to the point there is no end float, then remove one. This gives just a tad of movement. If you need to add alot of shims. Use the thicker alloy ones between the brass ones, but always make sure the end shim is brass as the alloy ones wear quickly.
Thats the core of the motor done. Armature is shimmed and fitted, bearings all maintained or replaced, so now it is time to move onto the endbell again and sort out the wiring etc.
This is easiest done without the endbell fitted, so leave the main parts in a safe place making sure you don't loose any shims.
First job on the endbell is to replace the suppression capacitors. The old ones looked ok, but they cost little and new ones look nicer and give peace of mind. Not really essential with modern 2.4ghz radio, but don't hurt either. Fit the capacitors to the timing ring loop then solder. Best tool to help with this is some needle nose pliers with an elastic band around the handle to make a clamp.
Trim the wires in the ring as close as possible.
You will note how little solder has been used. There is no need to pile it on, just use enough to make a good strong secure joint.
All soldering in this post has been done using a SolderCraft 40w iron (see website). You do not need a hotter iron. Just keep the tip clean!
Fitting the capacitors to the endbell is now easy. Simply feed a capacitor wire left long to each terminal, then fit the timing ring screw and it should in theory all pull into place. Then it is simply a case of a dab of solder on the terminals to secure the wires and trim off the excess.
Next up new brushes.
The brushes on this motor had been soldered to the endbell, which is a bit of a bug bear of mine. It looks messy, particually if your soldering skills are that of a blind baboon. The brushes tend to also come unsoldered if the motor gets too hot, so I always use tagged brushes if possible. I have blinged this one slightly with heatsink brush screws - Not essential.
Here we have the motor 95% ready. The original brush springs were in really good condition, so were reused.
At this point set the timing mid to low end and I tend to test the motor in hand using a 4 cell battery pack from an oval racer.
This just tells me if the motor runs OK before I wire it up. When it screams you get quite a buzz of satisfaction of a job well done.
This is a view of the endbell all ready for wiring up. You will see it is much cleaner and neater than when we started.
The whole process took about an hour including taking the photo's as I went, so not a massive job and I now have a good solid runner motor.
As I said at the start, this is never going to be a display case motor if that is your thing. I like to run my motors!
Finished. Period correct fluro motor wires with 3.5mm gold plugs fitted. I am not going to go through making up wires and connectors in this post as I suspect that may be the subject of the next one!
If you have never rebuilt a brushed motor, have a go. Comm lathes are available 2nd hand on Ebay and similar and are not expensive or borrow one from a mate. The parts used to rebuild this motor (brushes, shims etc) cost less than a tenner and I now have a nice usable vintage motor ready for the next event. This motor may well find itself in my Astute at Revival 2.0 Broxtowe next month.
We are fortunate that several manufactures are now making modifeld brushed motors again including LRP and Reedy (Please see website), so no reason not to try one in your vintage model.
I hope you found this article informative. Not our usual blog posts, but I hope it encourages a few of you to try old school motors or answers any questions you have.
If you haven't already please follow us on Facebook & Twitter to see all out posts and updates.
@racecraftrc
Unit 19 Brassmills Enterprise Centre
Brassmills Lane
Bath
BA1 3JN


Comments